To date my entire kayak fishing has been without the use of a fish finder. To locate the marks I have used my local knowledge, landmarks, and lobster pot buoys. I have longed for the day when I could fit a fish finder, which would give me a reading of the water depth and the structure of the seabed. For me this would be particularly useful when I drift over rough ground. It will be great to get a better indication of where the rough ground starts and finishes. This would save a lot of wasted time fishing over a featureless seabed. There is also of course the location of fish holding areas.
I wanted a straightforward fish finder rather than a combination fish finder and GPS. I felt for me it would work better to have a separate GPS and will be purchasing that later.
After a great deal of research, I decided on a Garmin Echo 550c.
The Echo 550c has all the specifications, features, and benefits I needed. I particularly liked the five-inch 480 x 640 video-quality colour display. My eyesight is not that great therefore, a decent sized high quality display was important.
The unit consists of the following components: the display, a tilt and swivel mount, the transducer, the power cable, a transom mounting bracket (not required), and a user manual. I was very pleased to see the power cable already had a 3-amp inline fuse fitted.

Other components purchased for the installation were a Ram Fish Finder Mount, a Transducer Installation Pad, a Scanstrut 16mm Deck Seal, and some Marine Goop.
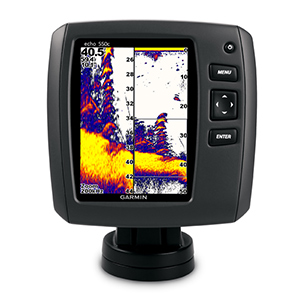 |
| Garmin Echo 550c |
The Echo 550c has all the specifications, features, and benefits I needed. I particularly liked the five-inch 480 x 640 video-quality colour display. My eyesight is not that great therefore, a decent sized high quality display was important.
The unit consists of the following components: the display, a tilt and swivel mount, the transducer, the power cable, a transom mounting bracket (not required), and a user manual. I was very pleased to see the power cable already had a 3-amp inline fuse fitted.

Other components purchased for the installation were a Ram Fish Finder Mount, a Transducer Installation Pad, a Scanstrut 16mm Deck Seal, and some Marine Goop.
 |
| Ram Mount, Transducer Pad, Deck Seal and Marine Goop |
The Ocean Prowler Big Game has a platform designed for fitting a fish finder. I decided to use this platform however, rather than fitting the finder directly to the platform I felt it would be a good idea to fit a 16" GearTrac along its full length. This would give me more versatility should I want to fit other products in the same area.
 |
| 16" GearTrac |
When I purchased my GearTrac I had to import directly from the manufacturer YakAttack USA. Fortunately, YakAttack products are now available in the UK and there is a local supplier Cornwall Canoes.
Fitted to the GearTrac is a 1.5" YakAttack Screw Ball. The ball simply slides into the GearTrac and screws down and I will use this to secure the Ram fish finder mount.
 |
| 1.5" YakAttack Screw Ball |

First job was to fit a 1.5" Ram Ball (Ram-202) to the base of the tilt and swivel mount using stainless steel screws, washers, and lock nuts. The base of the tilt and swivel mount is designed to take the Ram Ball with holes to match.

Next, I needed to secure a Ram 1.5" double arm socket (Ram-201) to the base.

The display simply clips onto the tilt and swivel mount.

After securing the whole unit to the GearTrac, using the YakAttack Screw Ball the fishfinder was now in position.
.JPG)
I now had to deal with the transducer, the transducer wiring, and the power supply wiring.
There is great discussion on the internet regarding the location of the transducer on a kayak. In an ideal world, the best place for a transducer is in the water however, most kayakers fit the transducer inside the hull and the transducer transmits through the hull.
As the Garmin 550c is a standard unit with no down imaging, finding a way to fit the transducer outside the kayak seemed unnecessary therefore, after checking with Garmin I decided to stick to the conventional way and fit the transducer inside the hull.
After roughing up the area with sandpaper and cleaning with alcohol, the transducer pad is stuck down using Marine Goop with a weight on top to keep the pad in place whilst drying.
Once the goop had dried, it was time to fit the transducer into the pad again using Marine Goop. About a quarter to a half an inch should be enough.
Bedding the transducer into the pad is a matter of pushing it down towards the hull to remove any air bubbles. After about 24 hours, it should be dry.
Next job was to route the power and the transducer wiring from the fish finder to the inside of the kayak.
The Scanstrut Deck Seal breaks down into four parts, the top, the base, a rubber seal, and a rubber grommet. The pack also contains three self-tapping screws to secure the rubber seal and the base to the deck.

About five inches behind the unit, I drilled a 16mm hole, which corresponds to the width of the hole in the rubber seal and base of the Scanstrut Deck Seal. Next, using the rubber seal as a marker, three small holes are drilled for the self-tapping screws.

Using plenty of marine sealant, the rubber seal and the base are screwed to the deck.
.JPG)
Now it was just a matter of running the wires through the deck seal to the fish finder, adjusting the slack, slipping the rubber grommet around the wires, and screwing the top back on. With more marine sealant added and the wire taped up the deck seal was now finished.
.JPG)
I mentioned the battery needed to power the fish finder and the battery box in a previous post. I wanted easy access to the battery therefore, decided to secure the box inside the kayak just below the front hatch. To strap the battery box down I secured some webbing and buckles to the hull using heavy-duty sticky Velcro tape with the addition of some marine Goop.

The battery box can now be easily secured and then removed after each trip.

With the power connected, the fish finder appeared to be working fine.
.JPG)
The final test will be on the water. This is when I will find out if the transducer has set in the Marine Goop correctly with no air bubbles to affect the readings.
Weather permitting I plan a trip this weekend to test the finder and get used to using it. For me the main objective is to be able to spend more time fishing over or near structure and less time over a featureless seabed.