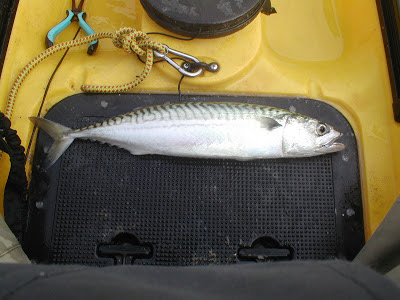
Monday 25 February 2013

Fal Estuary 23-02-13

Whenever I can, I like to do most of my kayak fishing on the main South Coast of Cornwall.  The problem is that stretch of coastline is rather exposed which can limit the amount of times I can get out particularly in the winter months.

I mentioned in a previous post Cornish Winter Mackerel about the Fal Estuary.  Being an estuary it is more protected from the wind and therefore, more accessible.  That is great because I can at least get out and do some fishing. 


Fal Estuary

The Fal Estuary holds a variety of species for example:

Mackerel
Scad
Herring
Pollack
Whiting
Thornback Ray
Codling
Conger Eel
Gilthead Bream
Dogfish
Bull Huss
Gurnard
John Dory
Sea Bass

The upper part of the estuary north of a line drawn from Weir point to Turnaware point is one of the many nursery areas for Sea Bass in the UK.  The official rule is "Fishing for bass from any vessel, as well as, fishing for any species of sea-fish using sand-eels (ammodytidae) as bait, Is prohibited in 37 separate areas for all or part of the year.  These areas, their extent and the seasonal duration of the prohibition are set out below.  The legislation is Statutory Instrument 1999 No 75 the Bass (Specified Areas) (Prohibition of Fishing) (Variation) Order 1999)."

Any vessel also means kayaks however, there are plenty of other species to catch, and the Fal Estuary holds almost all of the species you can catch on the main coast.

Today the forecast would make it difficult on the main coast therefore; I decided to fish the estuary where I would gain some shelter.

The plan was to fish at anchor in the deep channel using two methods.  The first method would be to fish with bait on the bottom and whilst waiting for a bite jig a Herring Rig weighted with a 50g jig.  The bottom fishing could produce anything and the jigging might produce Mackerel or Herring.

The tackle for the bottom fishing is a 7'6" 12-20lb boat rod, an Abu 6500 multiplier reel loaded with 15lb nylon line and a 30lb leader.  At the business end is a running ledger weighted with a 4oz to 6oz lead, a 30lb fluorocarbon trace and a pennel rig with two 5/0 Varivas Big Mouth hooks.  Bait would be fillets of Mackerel.

The river has a deep main channel and to the sides are shallow ledges.  I wanted to fish in the deep channel but close to the drop off from the ledge to the channel.


To date I do not have a fish finder or GPS therefore, positioning is not that easy.  However, by using land marks and dropping a lead down and counting the turns on the reel helps to judge the shallow from the deep although not very accurately.  To be able to know the depth and structure of the seabed a fish finder/GPS will be a luxury I shall look forward to!

The wind was stronger than the ride and coming from the opposite direction a situation known as wind over tide.  To counteract this I deployed the anchor at the stern and a drift chute at the bow.  This kept the bow of the kayak into the wind and pointing with the tide.


Anchor deployed at the stern.


Drift Chute deployed at the bow.

With the bait lowered to the bottom, I secured the rod in the Scotty Orca Rod Holder.


While waiting for a bite on the bait rod I jigged the Herring Rig down the bottom on the other side of the kayak.  The jigged Herring Rig caught the first fish a large jumbo Mackerel that took the jig used as a weight and extra lure.


Large jumbo Mackerel rich in tasty oils.


The next fish also came from the Herring Rig this time a string of Mackerel.


It took some time before a bite on the bait rod but finally I landed a fish a Lesser Spotted Dogfish otherwise known as a dogfish or doggy.


Lesser Spotted Dogfish.

Many anglers hate Dogfish probably because they can become a nuisance catch when you are trying for other species of fish.  I personally like Dogfish to eat and if you order rock and chips from the fish and chip shop, it is likely to be Dogfish.  I would rather catch Dogfish than nothing at all but of course, a nice Cod would have more appeal!

The next fish also came from the baited rod this time a Whiting.


Whiting.

Finally, I hooked a Herring on the jigged Herring Rig.


Herring.

This was a cold day only reaching a maximum 4°C!  Everything was OK apart from my feet, which eventually reached the point of no return, and it was time to stop for the day.

It was a reasonable mixed catch and I was grateful to be able to spend a Saturday out at sea.


Sunday 24 February 2013

Kayak Anchoring Wind Over Tide

Kayak fishing at anchor can be difficult when you are trying to use two rods one each side of the kayak and the wind is slightly stronger than the tide.  The ideal situation is to the have the anchor deployed from the stern with the kayak sitting nicely in the tide and your two fishing lines positioned down tide.  The angler sits in the kayak facing the bow and plays any hooked fish up tide towards him or her.


Problems arise when the wind is stronger than the tide and coming from the opposite direction.  This causes the kayak to sit more down wind instead of with the direction of the tide causing the tide and the wind to push the kayak slightly side ways on.  The fishing lines drift down tide causing one line to cross over the kayak following the path of the other, which can cause all sorts of problems and is very annoying!


In this situation, a drift chute or drogue can be very useful.  A drift chute deployed at the bow will sit just under the surface and act like an underwater parachute.  The push of the tide opens the parachute and pulls the bow of the kayak with the tide overriding the strength of the wind.


To be able to do this it is easier to use two separate anchor trolleys.  The main anchor trolley runs from the bow to the stern on the right side of the kayak.  This is used for either the anchor when anchoring or the drift chute when drift fishing.  On the left side of the kayak, a detachable half anchor trolley runs from the centre of the kayak to the bow.  When there is a wind over tide situation, it enables the use of a drift chute in conjunction with the anchor.

Deploying the anchor with the main anchor trolley at the stern and the drift chute with the half anchor trolley at the bow should keep the kayak facing the direction of the tide and more into the wind. 

I recently had a trip with a wind over tide situation.  The wind was coming from the North East and the tide was running from the South West the opposite direction.  The wind was stronger than the tide.  I wanted to fish with two rods therefore; this was the time to make use of the drift chute.  With the anchor deployed at the stern and the drift chute at the bow, the bow of the kayak turned more into the wind and the direction of the tide enabling me to fish two rods.


Drift chute keeping the kayak more into the wind and with the tide.


An alternative to using a drift chute in a wind over tide situation is to anchor at the bow instead of the stern and fish only one rod.  Anchoring at the bow will turn the kayak into the wind and more into the direction of the tide however, not enough to fish two rods because of the tendency of the kayak to swing more when the wind is stronger than the tide.  This does not cause a problem with one rod as the line will stay clear of the kayak.


Anchored at the bow turning the kayak more into the wind and with the tide.

Fishing at anchor from a kayak can be more problematic than from a boat because we are seated facing the bow and unable to stand up turn sideways or turn around however, by using a drift chute in certain situations or changing the position of the anchor problems can be overcome.

Sunday 17 February 2013

Cornish Winter Mackerel 16-02-13

I have always enjoyed eating fish and the humble Mackerel is one of my favourites.  Although not considered a top restaurant dish for me, it is one of the finest.  Not only is it good to eat it is also one of the hardest fighting fish for the rod and line angler to catch.  Pound for pound, it will outfight most of the species found in the UK.

It is mainly a spring and summer fish however, in Cornwall it can be caught in the winter.  I like to target Mackerel in the summer and the winter months.  The average winter fish tends to be a little bit larger than the summer fish and from an eating point of view, they are richer in tasty omega 3 oils.

To stand a chance of a decent catch in the winter I need to access deeper water than I would normally do in the summer months.  I am fortunate to live near the Fal Estuary, which is one of the deepest natural harbours in the world.


Fal Estuary.

The main channel that runs through the river the river is up to 100ft deep.  To the sides there are shallow ledges.  It is a former river valley drowned when the glaciers melted during the last ice age.


Deep channel winding through the river.

A satellite view also shows the deep channel and the shallow ledges.


My plan was for a slow drift along part of the channel jigging down the bottom.  The tackle would be a light 7' 10g-35g spinning rod and a 4000 size spinning-reel loaded with 20lb braid.  The thinness of the braid will mean a lighter weight can be used to get me to the bottom and the rod and reel would give some sport against the hard fighting Mackerel.


Light spinning rod and reel loaded with 20lb braid.

At the business end, I use a Herring Rig rather than conventional Mackerel feathers.  I find the hooks on normal Mackerel feathers are unnecessarily large and the feathers too long.  Yes, of course, they catch Mackerel but I have found the Herring Rig to be far more productive.  The lure or feather is only about 1" (2.5cm) and the hook size is only size 4 or 6 compared to the 2/0 of conventional Mackerel feathers.  Hook size 4 to 6 is more than big enough for the small mouth of the Mackerel.  Another bonus of using a Herring Rig is that if they are there it will catch Herring and it will catch Sandeels and Launce, which can be used later as bait for Sea Bass.


Herring Rig.

Rather than using a lead weight, I use a 50g metal jig with an assist hook.  A lead weight will not hook anything but the jig may hook a larger fish whilst fishing for the Mackerel.


50g jig used instead of a lead weight.

The jig also acts as an added attractor.


After paddling out into part of the main channel, I used the anchor trolley to deploy the drift chute at the bow to slow down the drift.  Deploying the drift chute at the bow or stern will turn the kayak into the wind and slow down the drift more than, if it is deployed on the side.  I recently completed an anchor trolley refit to reposition the pulleys closer to the bow and stern and today was the first time I tested it.  It is now working well pulling straight from the bow.


Drift chute deployed.

The first drop of the lures produced fish, which was an encouraging sign that the fish were here.


Subsequent drops produced more fish.


I landed more Mackerel then something different turned up a Whiting.


Unexpected Whiting.

I decided to bait a couple of the Herring Rig hooks with small stripes of fresh Mackerel.  Baited feathers can be an effective way of catching Whiting and a few more were landed although none were very big.


The session produced a decent bag of fish and the majority of the Mackerel were a good size compared to the babies you seem to catch in the summer months.


None of the Mackerel will be wasted and all will be eaten.  Mackerel are definitely better eaten very fresh however; I have found that provided they are caught, kept on ice, and frozen the same day they are still great to eat.  These should keep me supplied until the main run of Mackerel in the summer.

Sunday 10 February 2013

Kayak Battery Box

One of my future projects for the kayak is to fit a fish finder. The main objective would be to obtain readings of the depth of the water and the structure of the seabed to determine whether it is sand mud rock or a wreck.  At the moment, I use my local knowledge, landmarks, and lobster pot buoys to locate rough ground marks however; I am never really sure where the rough ground starts and ends.

To run a fish finder I need a battery and something to keep the battery watertight otherwise known as a battery box.  Research on the internet suggests most kayakers create a do it yourself battery box by purchasing a watertight plastic container and fitting a marine plug and socket connector to the container.  As simple as I am sure it is, electronics are not one of my strong points.  In addition, I did not really want to go through the process of purchasing all of the components separately and have to put them together therefore; I was looking for a purpose built fully rigged box.

Searching the internet, I managed to find a supplier of such a box the only snag being it was in the USA not the UK.  I decided to accept any extra cost and import from the USA.

The waterproof box is a Pelican 1120 Case.


It has a deck connector fitted to the side to make it easy to connect the wiring.


It also comes with the plug (male connector) to plug the fish finder wiring into the deck connector.


Inside the case is the necessary wiring to connect to the battery and foam for battery protection.


The battery supplied is a GPS 12V 10.5Ah sealed unit battery.


The case has two moulded holes, which could be used to secure the unit inside the kayak.


The battery sits in the box neatly protected by the foam lining.


The current cost of the package is $89.95 (approx £57) from Kayak Fishing Supplies USA. There is of course the cost of shipping to the UK and when I purchased the box it was $40.00 (approx £26).

It would be cheaper for the DIY version however, when you take into account the cost of the components needed plus the postage or petrol costs plus the putting it all together I consider the cost worth it for what is a quality product made for the job.  I hope that in the future a UK supplier will stock a ready-made kayak battery box.

Update 27/02/14

Since creating this post in February 2013, I have now produced a video (Feb 2014) about the battery box and how secure it to the kayak. The video is available on YouTube via the following link:  Kayak Battery Box Setup.

Thursday 7 February 2013

Kayak Anchor Trolley Refit

I highlighted in a previous post Kayak Fishing Set Up that with experience I realised I positioned my anchor trolley too far from the bow and stern.  Rather than fitting new pad eyes, I fitted the pulleys using existing pad eyes, which are 56cm (22") from the bow and stern.  This seemed a good idea at the time however, when using the anchor or drift chute I soon realised this caused a problem.  The pull was slightly sideways on causing the kayak to swing more in the wind than it should.  I decided to rectify the problem by fitting new pad eyes in order to reposition the pulleys and at the same time carry out some modifications.


Pulley too far from the stern
Access to the inside of the Ocean Prowler Big Game at the bow is easy due to the front hatch however; I had no access to the inside at the stern.  The plan was to fit the new pad eye at the bow using stainless steel screws nuts and washers and at the stern using rivets.  I purchased the following hardware:

New Pad Eyes
Rivets
Rivet Gun
Stainless Steel Screws Washers and Nuts
10m of 5mm cord


I removed the existing anchor trolley consisting of two stainless steel pulleys, two pieces of bungee cord and a swivel eye snap.

I have always felt that the ideal position for the kayak anchor trolley would be along the vertical side of the kayak however, to achieve this would mean drilling more holes closer to the water line than I was comfortable with. The Prowler Big Game has a flat surface running all the way along the side where the manufacturer had positioned some existing pad eyes. I decided to carry on using this flat surface for my new pad eyes.

Starting with the bow the first job was to drill two 5mm holes using the pad eyes as a marker.


When fitting accessories using screws and nuts I like to use a backing plate for extra strength.  This is simply cut from a nylon kitchen chopping board to the appropriate size.  Holes are then drilled to correspond with the holes drilled through the kayak.


Backing Plate


Using plenty of marine sealant the new pad eye is fitted and secured with the stainless steel screws, backing plate, washers, and nuts.


Inside the bow showing the backing plate


Next two 5mm holes are drilled at the stern again using the pad eye as a marker.  The first rivet is dipped in marine sealant with more marine sealant spread on the pad eye.  The rivet is then pushed through the pad eye and drilled hole then fixed using the rivet gun.  The process is repeated with the second rivet.


On my previous set up, I attached the pulleys to the pad eyes using short pieces of bungee cord, which is a standard set up.  The bungee cord is used to add some stretch to the line.  When the kayak rises and falls with the swell the stretch will make anchoring more comfortable and help to prevent the anchor being pulled free.  I have never been happy with this type of set up and decided to use carbine hooks instead.  The bungee cord will be dealt with later.


Because the anchor trolley cord will now run all the way from the bow to the stern, it will have more of a tendency to cut across the cockpit area following its natural straight path.


I have existing guides for the upper cord that prevents this but nothing for the lower cord.  The lower cord could be run below the ball of the ram rod holder and the cleat however; I decided to fit a deck fitting at the widest point to act as a hook and guide.


Next step was to attach the cord.  Starting with the bow one end of the cord is thread through the pulley from the bottom up then through existing guides and down through the pulley at the stern.  It is then tied to one end of the swivel eye snap.  The other end of the cord is then tied to the other end of the swivel eye snap.  I find that when using a drift chute the swivel eye snap helps reduce twisting of the drift chute line.


As an alternative to attaching a piece of bungee cord to the anchor trolley I decided to make it part of the anchor system and attached a short piece to the anchor rope.  Bungee cord is very strong and more than strong enough to cope with the tide in the areas I fish.  This will give me the stretch needed to make anchoring more comfortable.  When retrieving the anchor the pull would be on the anchor rope and SMB reel line not on the bungee cord.


Anchor system with the addition of a short piece of bungee cord.

The final step was to burn the tag ends of the cord and bungee to prevent fraying.

The anchor or drift chute can now be positioned much closer to the bow or stern and should work much better.