Monday, 27 January 2014

Kayak Fishing for Shellfish

For some time now, I have thought how great it would be to use the kayak to occasionally fish for shellfish as opposed to just fish.  Initially, I thought about buying a commercial shrimp and crab pot however, I soon realised on a kayak there could be potential problems.  The weight of the pots could make it difficult to pull up and the size could be a storage problem.

I wanted two pots, one for shrimps, and one suitable for lobsters, velvet swimming crabs, and larger crabs such as brown crabs and spider crabs.

For shrimps, I needed a pot with small entrance holes of about an inch.  This would ensure crabs would not enter the pot and make a meal of the shrimps!  Searching the internet, I came across an Eagle Claw Minnow Trap.


Although advertised as a minnow trap, the two entrance holes are only 1" diameter therefore, ideal for shrimps.  The pot is lightweight and measures only 16" x 9" therefore, no problem to carry on the kayak.  It has two equal halves that clip together held by a sprung clip.  Baiting up would be a matter of releasing the clip, and inserting the bait into a mesh bag or stocking.

To make sure the shrimps cannot crawl up the inside of the mesh and find their way out, I cut the tops of a couple of plastic salad dressing bottles and using the thread of the bottle, screwed into the entrance holes.  The thread holds it in place.  This should make it more difficult for the shrimps to find the entrance holes and escape.


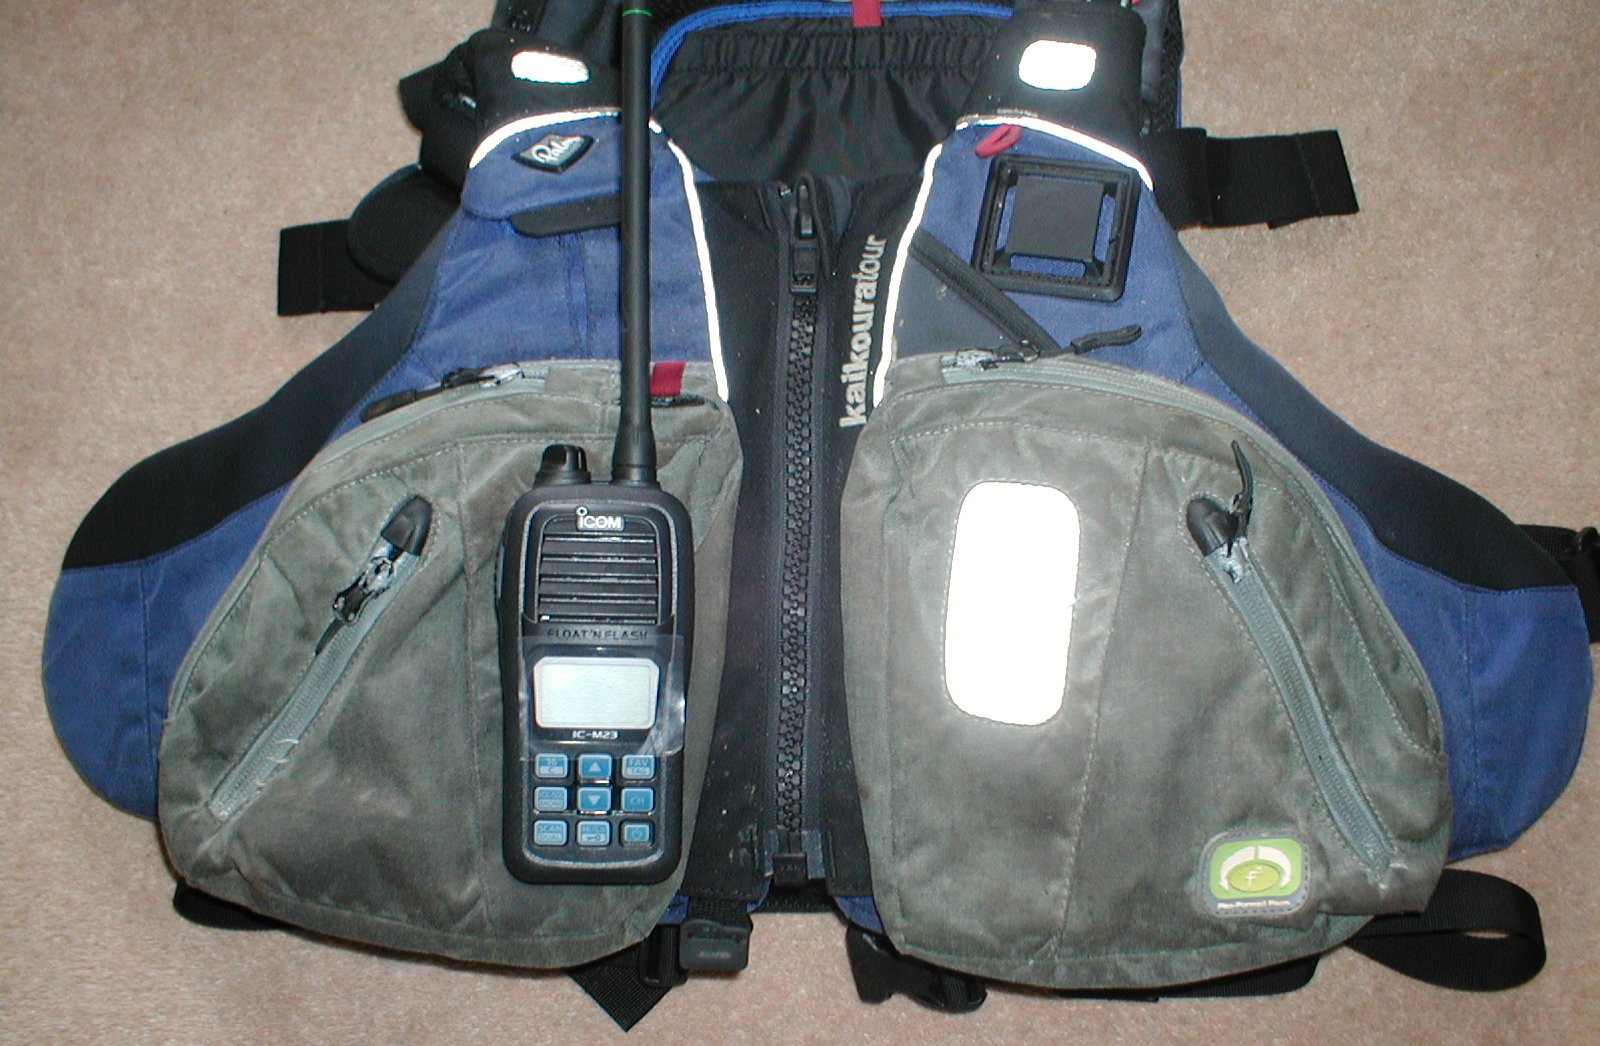
With the addition of a piece of cord, an SMB divers reel, a marker buoy, and a couple of weights, the shrimp pot was ready to go.


My biggest dilemma was finding a suitable pot for lobsters or velvet swimming crabs but in particular, larger crabs.  The majority of hobby pots available are more suited to small crabs, or freshwater crayfish with entrance hole sizes to suit as shown below.


Although lightweight and collapsible, the entrance holes on this pot are only 6cm, which would be fine for velvet swimming crabs and possibly lobsters but not edible brown crabs and spider crabs.

Commercial crab pots have much larger entrance holes of about 20cm however; they are much too heavy and bulky to manage on a kayak.


Eventually, I came across a collapsible pot supplied by Castnets.


This trap has a full width walk in one-way soft entrance measuring 55cm x 35cm at both ends therefore, no problem with the entrance being too small for larger crabs.


The pot is not small, the collapsed measurements are 109cm x 55cm x 35cm however, I found it no problem to store on the kayak.  I can position it behind my seat secured with a piece of bungee cord and a carbine hook.


The weight is about 2kg, which is about the same as my anchor with chain therefore, no problem to haul up from the depths.  Of course, in the unlikely event that I may fill the pot with sweet spider crabs, there should be no problem hauling the pot up with a few crabs inside.

Once again, with the addition of an SMB divers reel, a marker buoy, and a couple of weights, the crab pot was ready to go.


The next step was to work out how and when to set the traps from the kayak. I could paddle out, set the traps, leave them for a day, and come back to pick them up but I did not really want the hassle and the commitment. For me, it would be far more convenient to set the traps when I planned to go out fishing for the day and collect on the way in.

In addition, I needed to learn the habitat of the species I was targeting.  There is a great video on YouTube produced by Seafish that gives an insight into UK commercial shellfish fishing with plenty of useful information on the various species.


Before actually using the traps, I wanted to check with the Cornwall Inshore Fisheries and Conservation Authority any rules that may apply to non-commercial shellfish anglers.  Although there is no limit to the number of pots a hobby angler can use there are regulations as follows:
  • There are the usual minimum size limits
  • A maximum of two fish per day can be landed from the following species: lobster, crawfish, edible crab, or spider crab.
A maximum of two fish could be two lobsters, or one lobster and one edible crab, or one edible crab and one spider crab etc.

Additional rules apply to lobster and crawfish (spiny lobster) as shown on the minimum size limit chart as follows:
  • The removal of berried lobsters and crawfish is prohibited.
  • V-notched lobsters and crawfish must be returned, and any with a tail flap which is missing or mutilated unless specific permission has been granted by Cornwall IFCA.
This year each time I go out fishing for the day, I will be taking the pots with me and will post later on their success or failure. Apart from the possibility of adding shellfish to the dinner table, collecting the pots after fishing will be an exciting added interest to the day.

Update June 2014:

Since writing the above post I have experimented with the pots and below is a video about kayak fishing for shellfish.


Saturday, 18 January 2014

Kayak Clothing - Winter Socks

When out on the kayak in the winter, there is one thing I suffer from badly and that is cold feet!  I have no problem keeping the rest of the body warm however; it is always my feet that succumb to the elements first.  I have tried all the usual layering such as, a pair of liner socks followed by a couple of pairs of high toggle rating thermal socks however, I still come in with numb feet caused by the cold.

I admit keeping your feet warm in the winter on a kayak is not easy.  The feet are in a stationary position with toes pointing upwards encouraging blood to flow away.  Another problem is water getting into the neoprene boot, which usually happens when wading in to launch the kayak.  Although the stocking feet of immersion suits are waterproof, any amount of cold water surrounding the foot is not conducive to keeping your feet warm.

After trying several different types of socks advertised as Arctic or extreme cold weather socks without success, I had just about given up on the possibility of going out on a winter’s day for six to eight hours fishing and coming in with feet I can walk on!  However, I then came across a pair of Lorpen Trekking Expedition Polartec Primaloft Socks.


These socks certainly looked and felt different from any other socks I had tried.  The manufacturer Lorpen describes the socks as follows: "the ultimate sock for the true expedition experience designed for hard shell mountaineering footwear and extended cold weather.  Two layers of Polartec Power Stretch fabric sandwiching PrimaLoft Footwear insulation in a left and right foot anatomical shape put these socks on the cutting edge of warmth technology.  Tested above 8,000 meters these socks are as good as it gets".

With a retail price tag of £55.00 I was hoping they were "as good as it gets".  Fortunately, in the New Year sales I picked up a pair for £32.97, which is still expensive.

It was unlikely that these socks on their own would be enough therefore; my layering plan was as follows:

A pair of 65% Marino wool liner socks.
A pair of Lorpen Trekking Expedition Polartec Primaloft Socks.
A pair of toggle rated four thermal socks.
The stocking feet of my immersion suit.
A pair of Crewsaver 5mm neoprene wetsuit boots two sizes bigger than my feet.


Despite all of the above, I did not expect the luxury of coming in after eight hours fishing in the cold with toasty warm feet however, if I could at least cure the tingling numb feet I could hardly walk on I would be pleased.  I am happy to report that is the case.

I have had two winter trips since purchasing the Lorpen socks and they have definitely made a difference.  My feet stay comfortable all day and when I come in and walk; my feet no longer feel numb.  The only improvement I feel I could make is a pair of longer neoprene boots that come up to below the knee instead of above the ankle.  This may stop some of the water getting into the boot.  To date, I have not been able to find a pair big enough (UK14) to have enough room for all of the layers and still maintain some important airflow!

Sunday, 24 November 2013

Fal Estuary Kayak Fishing 23-11-13

A video of a cold but very sunny November day spent kayak fishing in the Fal Estuary, Cornwall for a variety of species.  Recommended to be viewed in HD.


Monday, 18 November 2013

Cornish Autumn Whiting 16-11-13

I live near the Fal Estuary and in the autumn and winter months, Whiting migrate into the estuary in good numbers.  They stay through to the spring however, November to January produces the better quality fish therefore, this is a good time for me to target them.  Whiting are a member of the Cod family and in the summer months, they tend to populate sandy areas near structure such as wrecks and reefs.  In the autumn when the water temperature starts to drop, they migrate closer to the shore looking for any available food sources such as crabs, prawns, and worms. The Fal Estuary is abundant with small crabs and shellfish and the main channel has the clean muddy bottom, which is a typical habitat to find Whiting.

As Whiting are a shoal fish, the rig I use is an Island Whiting Rig baited with strips of Squid.  This is a multi hook rig fished as a running ledger and will often catch more than one fish at a time.  The hooks are 1/0 Eagle Claw Sproat Worm hooks which have a couple of claws near the eye that help to keep the squid strips on the hook nice and straight.  The teeth of Whiting are sharp, it is important to fish with snoods that will cope with those sharp teeth, and a minimum of 30lb is recommended.  Readymade Island Whiting Rigs or the hooks and components can be purchased from UK Hooks.


I had the whole day to fish and rather than just target Whiting for the whole period, my plan was to try for a mixed bag of fish and spend the first couple of hours drifting for Mackerel or Herring and then drop anchor at low water and fish the flooding tide using bait for Whiting.

After launch, and a paddle out to the area I wanted to drift, the fishing began by jigging the Herring Rig weighted with a 50g metal jig, which is a method I have highlighted in previous posts.


The autumn and winter is also a great time for Herring as is was not long before I started catching them along with a few Mackerel.


One exiting thing about fishing is the unexpected.  You can make plans for what you expect or hope to catch but on occasions, the surprise element happens as it did this day with a John Dory otherwise known as St Peters Fish, tempted by the jig on the end of the Herring Rig.


John Dory are not usually targeted by rod and line anglers however, I have caught them unexpectedly using lures for other species.  They do feed on other fish hence the fact that I have caught some on lures jigged down near the bottom.

Another bonus fish landed and taken on the jig was a Gurnard and I cannot recommend enough replacing lead weights on the end of a string of feathers with a metal jig.  A lead weight will not catch anything but the jig will.


With a few fish packed away on ice inside the kayak, it was time to drop anchor and target the Whiting.  Rather than drop anchor anywhere my chosen mark was close the one of the many pools along the main deep channel of the Estuary.  The recent purchase of a Garmin GPSMap 78 loaded with marine BlueChart g2 has proved to be a great asset when it comes to selecting marks to fish.


With the anchor deployed, two rods were baited up with the strips of squid and lowered to the bottom.


While waiting for a bite on the bait rods, and to maximise my chances of a good mixed bag of fish, I monitored the fish finder for any passing shoals of Herring or Mackerel.  If they show, I can capitalise by lowering the Herring Rig amongst them.

The Whiting were there and it did not take them long to find my strips of squid and some decent sized fish were landed along with the inevitable Dogfish, another Gurnard, and a few more Herring.  Although Whiting can grow to about 7lb, the majority of the inshore fish caught are 1lb or less and a 2lb fish is considered a specimen.


Whiting are a good eating fish and I was getting short of white fish in the freezer therefore, it was pleasing to stock up and even more pleasing to get a good mixed bag of fish.  The John Dory will be a rare treat.


I once heard a commercial day fisherman say "we harvest what passes by our door" and I would certainly agree with that statement.  I hope that the weather will allow me to get out and harvest some more Whiting before they head back to their offshore habitat.

Friday, 8 November 2013

Autumn Beach Fishing for Sea Bass 07-11-13

The autumn storms have arrived and over the recent weeks, it has been impossible to get out on the kayak.  Winds of between 25mph and 45mph along with rough seas and big swells means the kayak has remained firmly locked away in the garage! 

This is the time of year for me to dig out the 12ft 2oz to 4oz Bass rod, oil the Abu 6500c reel, make up some rigs, and head off to the beach armed with a bucket of bait for some surf fishing.


I have fished this beach for 30 years and it produces Bass three hours either side of low water.  At high water, I have caught Bass but never as consistently as low water.  For the last two days, the sea has been rough and the biggest problem is loose weed, which can make it un-fishable.  Today, the wind had dropped leaving a nice steady surf and looking at the breakers it appeared reasonably clean although weed left by the previous tide could cause a problem later as the tide floods.

The tackle is a 12ft 2oz-4oz Bass rod, and an Abu 6500 reel loaded with 15lb mono and a 40lb leader.  Leads of more than 4oz are not needed at this beach hence only a 40lb leader.  The rig is a straightforward fixed paternoster with a short snood.  Distance casting is not required.  If the Bass are here, they are usually between 20 yards and 80 yards from the shore therefore, there is no need for a distance-casting clipped down rig.


These days I always use razor fish as bait, which I gather myself and freeze for later use.  This makes it very convenient when needed for a fishing trip.  It has a fantastic scent and a bright attracting colour.  The only problem is its softness, which can be difficult to work with however; the use of bait elastic to bind the bait solves that problem.


Of course, lugworm, ragworm, and peeler crab are also great baits however, lugworm and ragworm need to be kept alive, and unless you gather peeler crab yourself, it is very expensive.  I have caught just as many Bass on frozen razor fish than I ever did when I used fresh worms or peeler crab.

I started fishing about two hours before low water.  The fishing was slow however, about half an hour before low water there was a strong pull on the rod tip followed by slack line, and a Bass was landed.


When hooked on a beach, rather than pull against you, Bass tend to run towards you which means having to reel like mad to keep up with the fish otherwise the slack line could result in a lost fish.  Because the fish run so fast towards you, sometimes you cannot be sure it is still hooked until you catch up with it close to the shoreline.  This can be a bit unnerving and a relief when you eventually feel the thump of the fish shaking its head.

This fish measured 39cm, which is over the landing size limit of 37.5cm however, I have a personal size limit of 40cm therefore, this fish was returned.  It was also the only fish of the day.  I fished on for the first three hours of the flooding tide and although I had a couple of bites they did not materialise however, one fish is better than none particularly when shore fishing and it was pleasing to catch something.

There is no doubt in my mind that kayak fishing for Bass is far more productive.  Trolling a lure or casting lures on the drift over shallow rough ground is more likely to produce better quality fish than fishing sandy beaches from the shore.  However, standing on a nice beach with great surf coming in is very enjoyable and therapeutic.  I have done it now for 30 years and will continue as long as I can particularly, in the autumn when the sea dictates that it is not possible to get out on the kayak.


Monday, 21 October 2013

Creating Waypoints and Tracks

I recently purchased a Garmin GPSMap 78 handheld navigation device along with the Garmin Marine BlueCharts g2, and the Garmin HomePort marine planning software.  The ability to be able to use my computer and the HomePort software to create waypoints to various fishing marks and to be able to navigate to those marks with ease using the GPS has greatly enhanced my fishing experience.  In addition, the ability to be able to create tracks over ground I want to troll means, I can now cover that ground with far greater accuracy than before.

Creating waypoints using the HomePort software and the marine BlueCharts g2 and then sending those waypoints to the GPS is easy.  The marine chart is stored on the GPSMap 78 via a micro SD card.  By opening the HomePort software and plugging the GPSMap 78 into the computer via the USB lead provided, the marine chart displays on the screen.


To create waypoints I select the waypoint tool and click on the marks I want.  In this example, it is the launch site and the fishing mark.


I then name the newly created waypoints in a name of my choice by right clicking on the waypoints located in the left column and selecting rename.


Sending those waypoints to the GPSMap 78 is a matter of right clicking on the waypoint located on the left column, selecting Send To, and then selecting the Garmin GPSMap 78.


By selecting Go To via the waypoint manager on the GPSMap 78 a track is created assisting the navigation to that mark.


One enjoyable method of kayak fishing for Bass and other species is trolling.  Although physically hard work, it is relaxing, good exercise, and from a fishing point of view can be rewarding.  Cornish commercial line fishermen use this method for Bass, Pollack, and Mackerel and they call it whiffing which just means trolling a lure slowly from boat at just enough speed to get the lure working.
 
In the past, I have trolled areas using landmarks to determine my location and the fish finder to determine the depth however, apart from when hugging the shoreline, I could never be sure exactly where I was, or the ground I had previously trolled.
 
With the HomePort software and the BlueCharts, I can now set tracks over the ground I want to troll and send those tracks to the GPSMap 78.  When trolling, I can follow those tracks enabling me to cover nearly all of the ground.  In addition, if I catch in a certain area I will know exactly which track I was trolling and can repeat the troll along the same track as it may be an indication a fish holding area.


To create tracks I select the ‘New Track’ tool and simply click and drag the tool over the area I want and repeat the process until I have created all of the tracks required.


As with the waypoints, I rename the tracks with a name of my choice and send them to the GPSMap 78.  To activate the tracks I simply select 'Show on Map' via the track manager.

Although the marine BlueCharts are excellent they do not show areas of underwater rough ground unless that rough ground exposes at some point in the tide therefore, unfortunately, I cannot use the marine chart to create waypoints to those marks.  However, some of those marks show on Google Satellite Maps or Google Earth and I can use Google to create waypoints and then transfer those waypoints to the BlueChart.  The following is an example of small rough ground marks, which act as an oasis to fish such as Pollack.


The same area on the BlueCharts unfortunately, does not show the submerged features.


To create a waypoint using Google Earth I first create a place mark by selecting the 'Add Placemark' tool then reposition the place mark on the mark.


This gives me the coordinates I need to create the waypoint on the BlueChart.


Back on HomePort with the BlueChart open, I then create a new waypoint in roughly the area of the mark then copy and paste the correct coordinates from Google Earth. This creates the new waypoint in the correct position ready to name and send to the GPS.


The only negative I can find with the Garmin BlueChart is that apart from exposed rocks and submerged wrecks it does not show submerged rock marks.  This area, which has several small-submerged rocky areas, shows only as a sandy bottom on the chart.  However, this may be typical of electronic marine charts.

These facilities may or may not improve my catch however, one thing is for sure, it has certainly enhanced my fishing experience making it more interesting and satisfying.

Friday, 20 September 2013

Icom IC-M23 VHF Marine Radio

Safety is paramount and the most important priority to consider when going out to sea kayak fishing.  Although I study several weather and shipping forecasts prior to any trip I can never really be 100% sure what may happen when I am out there.  The Cornish coast is like any coast, it can change very quickly and unexpectedly.

Since taking up kayak fishing, I have acquired several safety items for that 'just in case situation'.  For example, suitable clothing, a spare paddle, a paddle float to assist re-entry, a throw line attached to my waist to ensure contact with the kayak in the event of a capsize, a first aid box, a whistle, a knife to cut myself free in the event of entanglement, a bilge pump, a compass, and a GPS navigation device.

To date, most of my kayak fishing trips has been solo.  One vital piece of safety equipment was missing from my list, suitable communication!  A mobile phone in a dry bag seems a good idea except if there are signal problems or the phone gets wet in a capsize situation rendering it useless.

To solve that 'just in case' communication problem I have now purchased an Icom IC-M23 Bouyant VHF Marine Handheld Radio.


In the event of a capsize, the radio is waterproof when fully submerged for up to 30 minutes and is designed to float and flash when in water.  It is small measuring only 13cm in height and small enough to fit in the right pocket of my Palm Kaikoura Tour PFD.  The pocket is designed for a VHF radio therefore, an ideal place to store it.


In case of an emergency requiring assistance, I could contact the coast guard and other vessels by sending a distress call on channel 16.  In addition, a recently purchased handheld GPS would enable me to give my current coordinates thus assisting any rescue team in finding me.

However, before being able to use the radio legally I have to obtain an operator's license by attending a one-day marine radio and GMDSS course at my local Truro College at a cost of £80 plus £30 for the certificate.  I have booked myself on the next available course in a couple of week's time. 

The Global Maritime Distress and Safety System (GMDSS) is an international system, which uses terrestrial and satellite technology and shipboard radio-systems to ensure rapid and automated alerting of shore based communication and rescue authorities.  The communication also goes out to ships in the immediate vicinity in the event of a marine distress.

Although I will not be taking any more chances with the sea the addition of the VHF radio has definitely given me more confidence that should I find myself in a distress situation I now have suitable back up to call upon.


Monday, 16 September 2013

Fitting a Navigation Device - Garmin GPSMap 78

Fitting a fish finder earlier in the year has greatly enhanced my fishing capabilities and experience. The facility to be able to see the structure of the seabed, the depth of the water and find shoals of fish has been fascinating and educational. To enhance that experience even more it would be great to be able to mark the waypoints of features I fish over such as rough ground marks, wrecks, pools, gullies, banks etc. This would enable me to navigate back to those marks with far greater accuracy rather than having to use landmarks, a compass, and the fish finder.

Apart from navigating to fishing marks there is the safety element a GPS navigation device would bring.  Being able to mark launch sites would give some peace of mind should the fog roll in making visibility impossible.  A GPS would help me navigate back to the launch site in such poor visibility.  In addition, should I need to give out a distress call I could give coordinates of my current position thus helping any rescue team locate me.

I have been very pleased with the performance of the Garmin Echo 550c fish finder therefore, decided to stick with Garmin and purchase the GPSMap 78.


The device has all the features and specifications I needed.  It comes with a world base map however; there is an option to purchase detailed marine charts called Garmin BlueChart g2 installed via a micro SD card. The blue charts have a fishing chart, which displays detailed bathymetric contour lines; this would be very useful in selecting marks to fish.


In addition, with the purchase of the marine planning software HomePort, waypoints and routes can be planned at home on the computer and transferred to the device. This option particularly appealed to me.


Although the unit is a handheld unit that could be kept in a pocket, I wanted to fit a GPS mount on the kayak that would enable me to view the map and route whilst paddling.  To do this I purchased the following components:

1 x Ram Holder for GPSMap 78 (Ram-Hol-GA40)
1 x Diamond Base with 1" Ball (Ram-B-238)
1 x Double Arm Socket for 1" Ball (Ram-B-201)
1 x YakAttack ScrewBall 1"


I mounted my fish finder on a 16" GearTrac.


It was always my plan to use the GearTrac to fit other devices and this is ideal for mounting the GPSMap 78.

First job was to fit the 1" diamond base to the back of the GPS holder using the screws and lock nuts provided.


Next, I needed to secure one end of the 1" double arm socket to the diamond base.


The YakAttack screwball screws on to the GearTrac.


To complete the mount I fixed the other end of the double arm socket to the YakAttack screwball.


The device sits nicely now alongside the fish finder and within reach from my seat and can be tilted forward if necessary.


I mentioned the option to purchase BlueChart g2 marine charts.  Direct from Garmin, I purchased the chart for my location in the southwest called HEU463S - Bristol Channel & England S/W.


The chart is pre installed on a micro SD card that simply slots in underneath the batteries.


I also purchased the marine planning software HomePort, and downloaded the software direct to the computer from Garmin.  HomePort enables me to view the marine BlueChart g2 on the computer by plugging the GPSMap 78 into the computer via the USB cable provided.

There is a choice to view the charts in either navigation mode, fishing chart mode, or both.


Setting waypoints and sending that waypoint to the GPS is straightforward. 

First impressions of the Garmin GPSMap 78, the Blue Chart g2, and the HomePort software are impressive and I shall look forward to using these facilities to enhance my fishing experience even more.